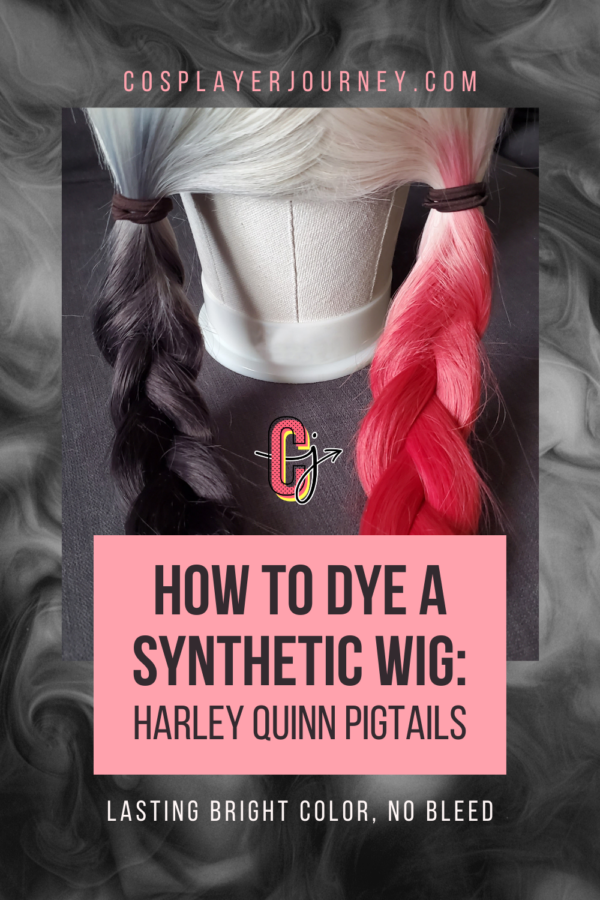
How to dye a synthetic wig : Harley Quinn pigtails
Dying a synthetic wig is fairly cheap and easy, as long as you follow the directions and are careful. I made a couple 'oops' mistakes while dying this Harley Quinn wig, sooo I'll show you how to avoid them. BTW: Using Rit Dye is the best method for dying wigs in my opinion. It's longer lasting, doesn't fade, and once it's rinsed out and dried it doesn't bleed. I've died a wig before using the Sharpie method (my Arkham Knight Harley Quinn wig) and it didn't work great.. whenever the wig got wet through rain, high humidity, or even sweat, the color bled onto my white shirt.. I had to use bleach often to get the color out… So yeah - Let's get started!
WARNING: NOT ALL SYNTHETIC WIGS ARE THE SAME.
Make sure you have a Heat Resistant wig, and make sure to note the highest temperature it can handle.. mine handles up to 320°
WHAT YOU’LL NEED:
Rit DyeMore for Synthetics liquid dye
Racing Red
Graphite
Stainless Steel Pot
Measuring Cup
Plastic Gloves
Dishwashing Liquid Soap
Paper Towels
Towel (that you don't mind possibly getting stained)


DYING THE FIRST PIGTAIL

1. Fill the pot with water and heat to 180-200° (almost boiling)
The directions on the bottle say about 3 gallons of water per 1lb of fabric. Since we are only dying a single pigtail, I did 1 gallon (8 pints). If you are dying a whole wig, I would do 2 or 3 gallons depending on how much hair there is.
Once the water reaches that temp, lower the heat on your stove. You don’t want it to continue getting hotter, and also don’t want it to cool too quickly. If it gets too hot, you’ll risk melting your wig!
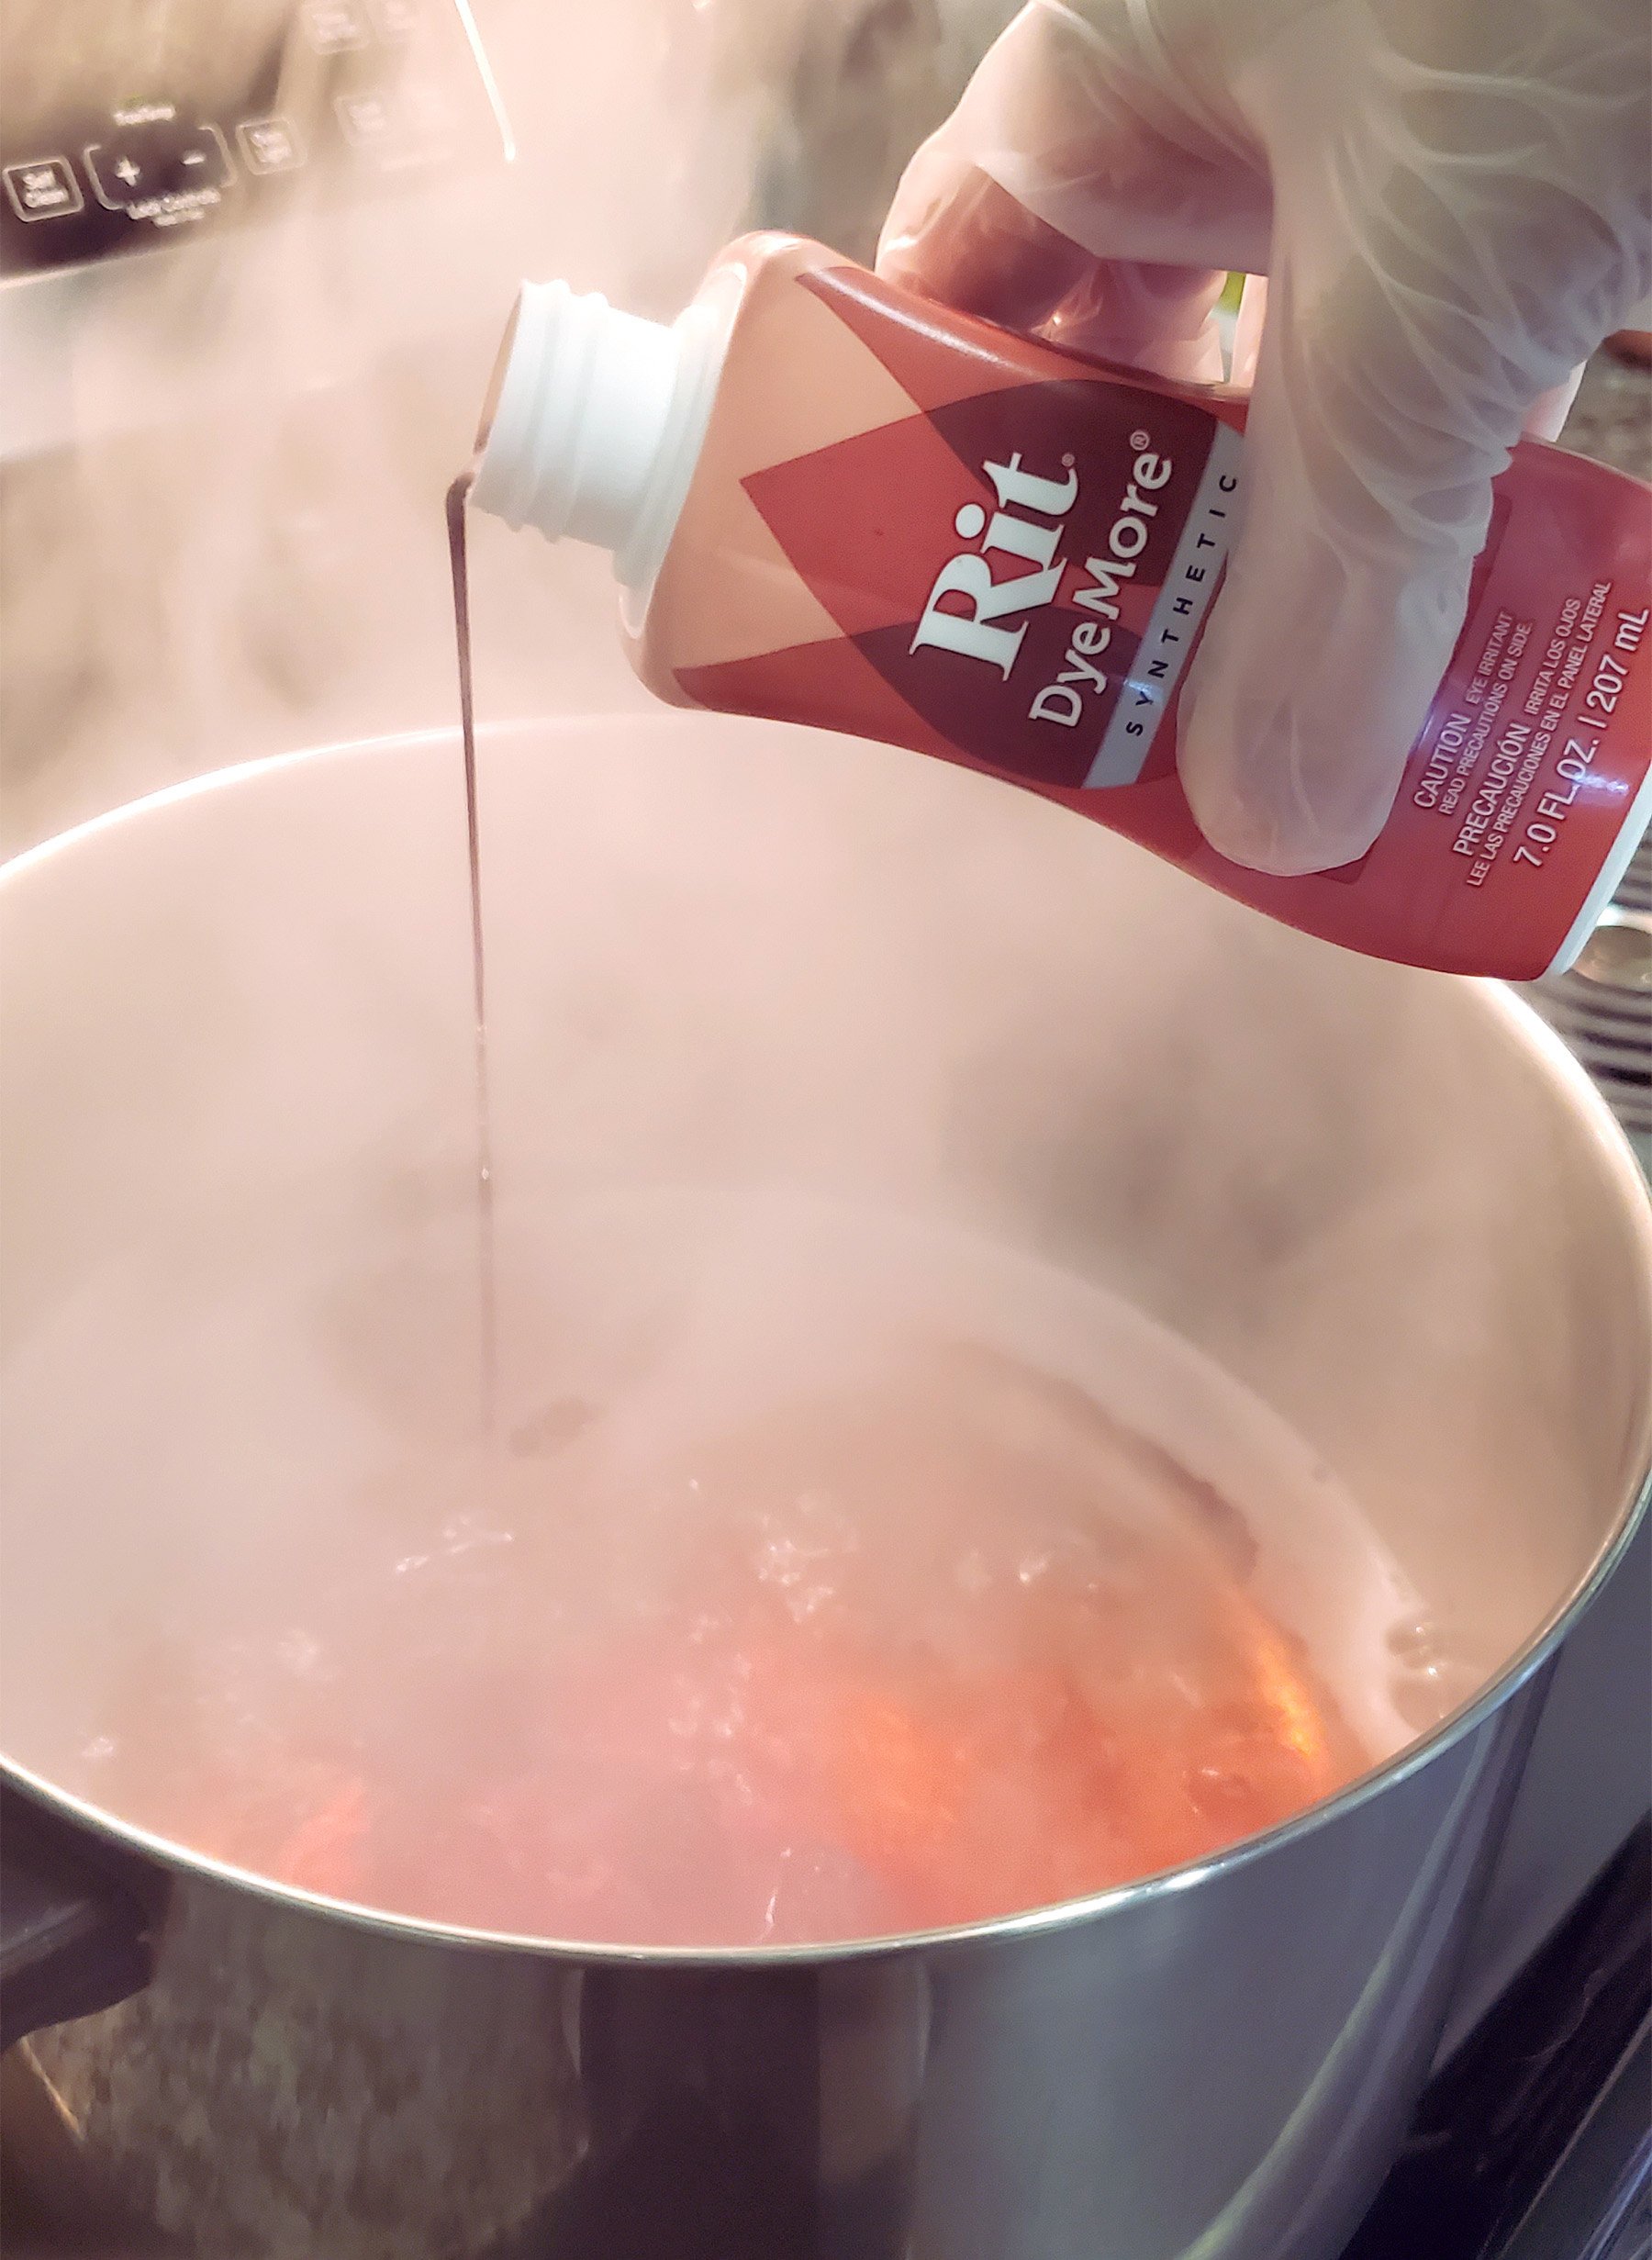
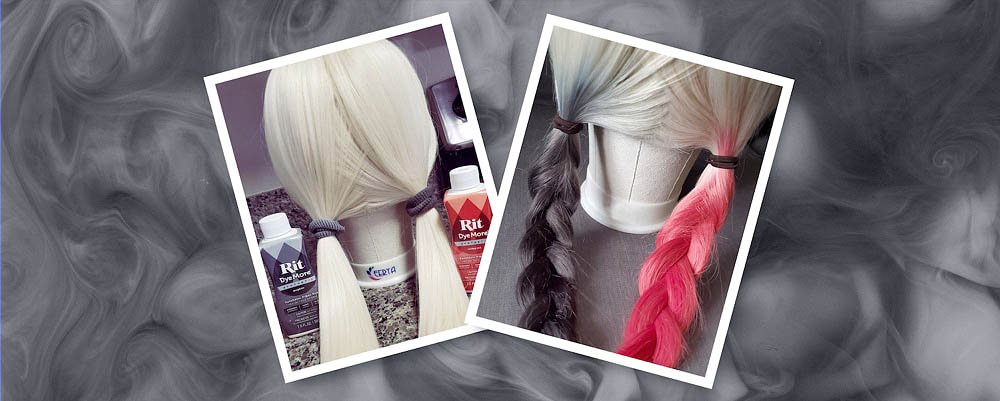
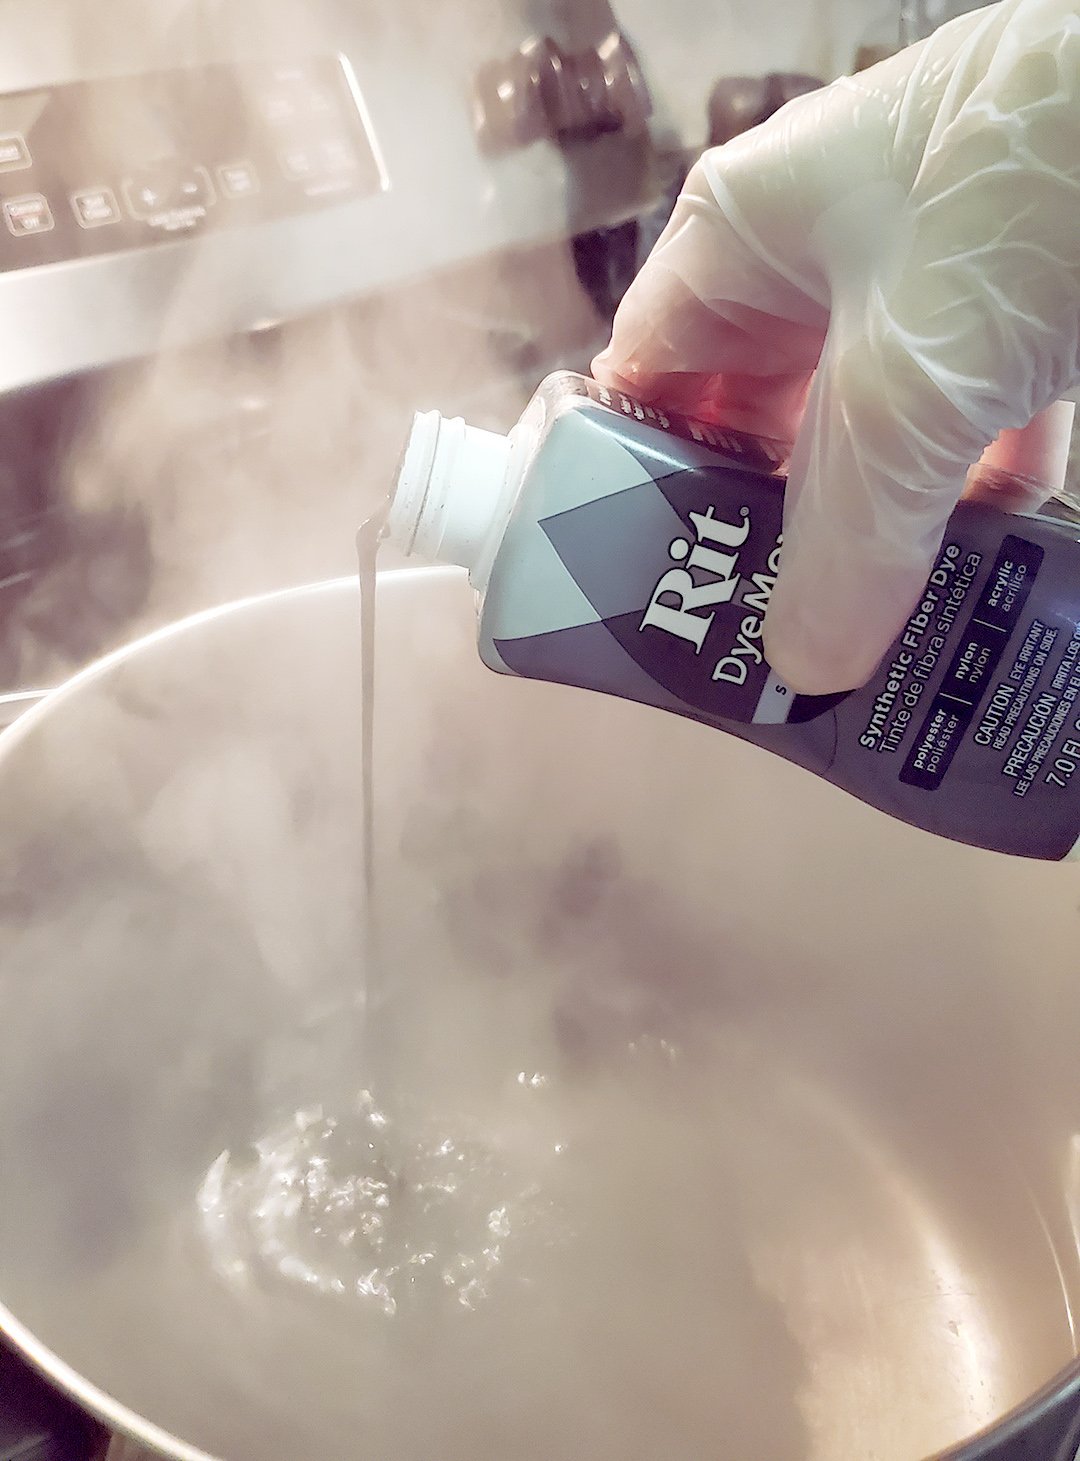
2. Add the dye + 1 teaspoon of liquid Dish Soap
After putting in the dish soap, I dumped in about half of the bottle of dye. Stir the dye around a little bit to mix. I purposely started with the red because if I accidentally got some on the other pigtail, the black will easily cover it up.
OOPS #1 … which I did.

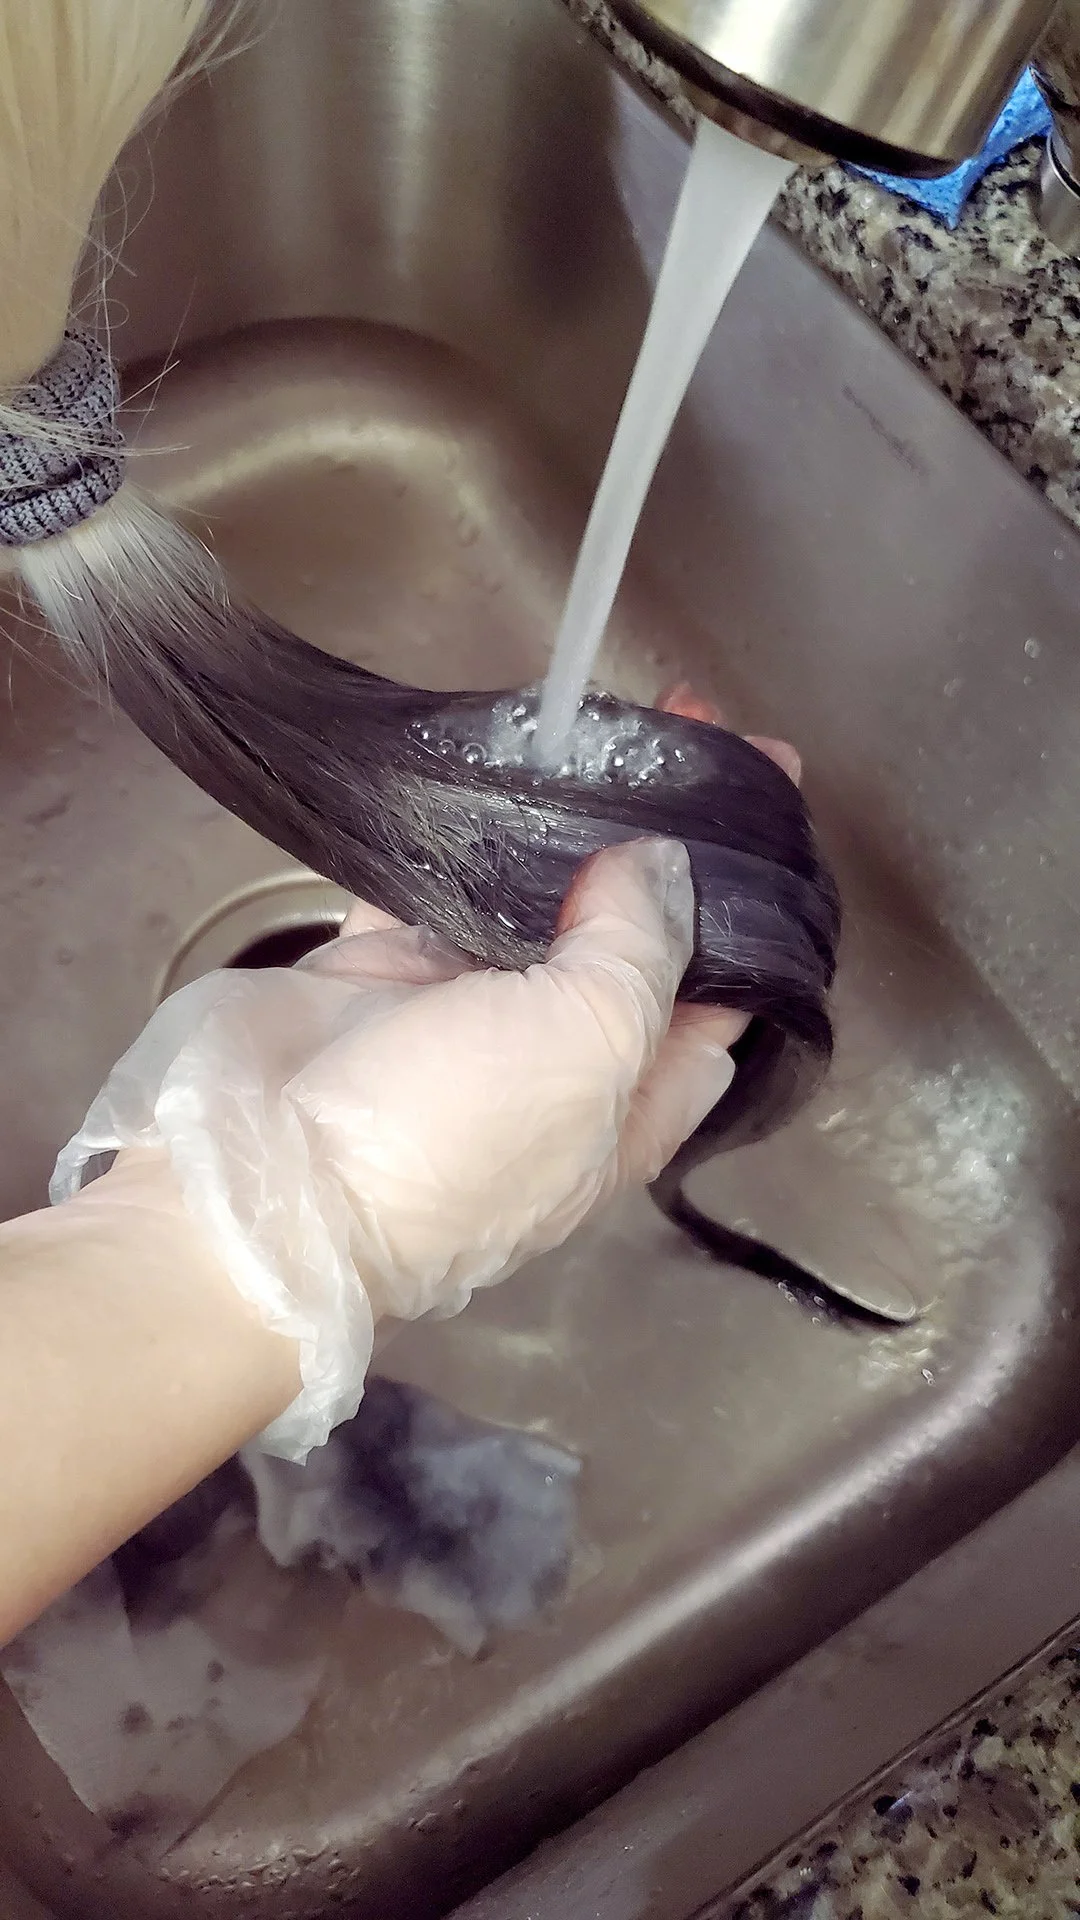
3. Dunk your wig!
For Suicide Squad 2’s Harley Quinn, the red pigtail is on her right side. So dunk that pigtail down into the pot and let the dye reach just below the hair tie. Then slowly pull it straight up. Let the dye drip down the pigtail back into the pot. If you keep the bottom portion of the pigtail in the pot instead of fully lifting it out, it’ll be darker than the top. You’ll get a slight ombre effect. Use your judgement on how dark you want the color to be!
If dying a whole wig, just submerge it completely. Swirl it around the pot to make sure it dyes evenly without any lighter patches. Keep it in as long as needed to reach the desired shade.

4. Dab out some of the dye
Use a paper towel to get that softer blend at the top to avoid a harsh straight line. Gently squeeze and absorb some of the dye out of the pigtail. I do this after the first two dunks or so.
After that, make sure following dunks into the dye are below that point to keep the fade.
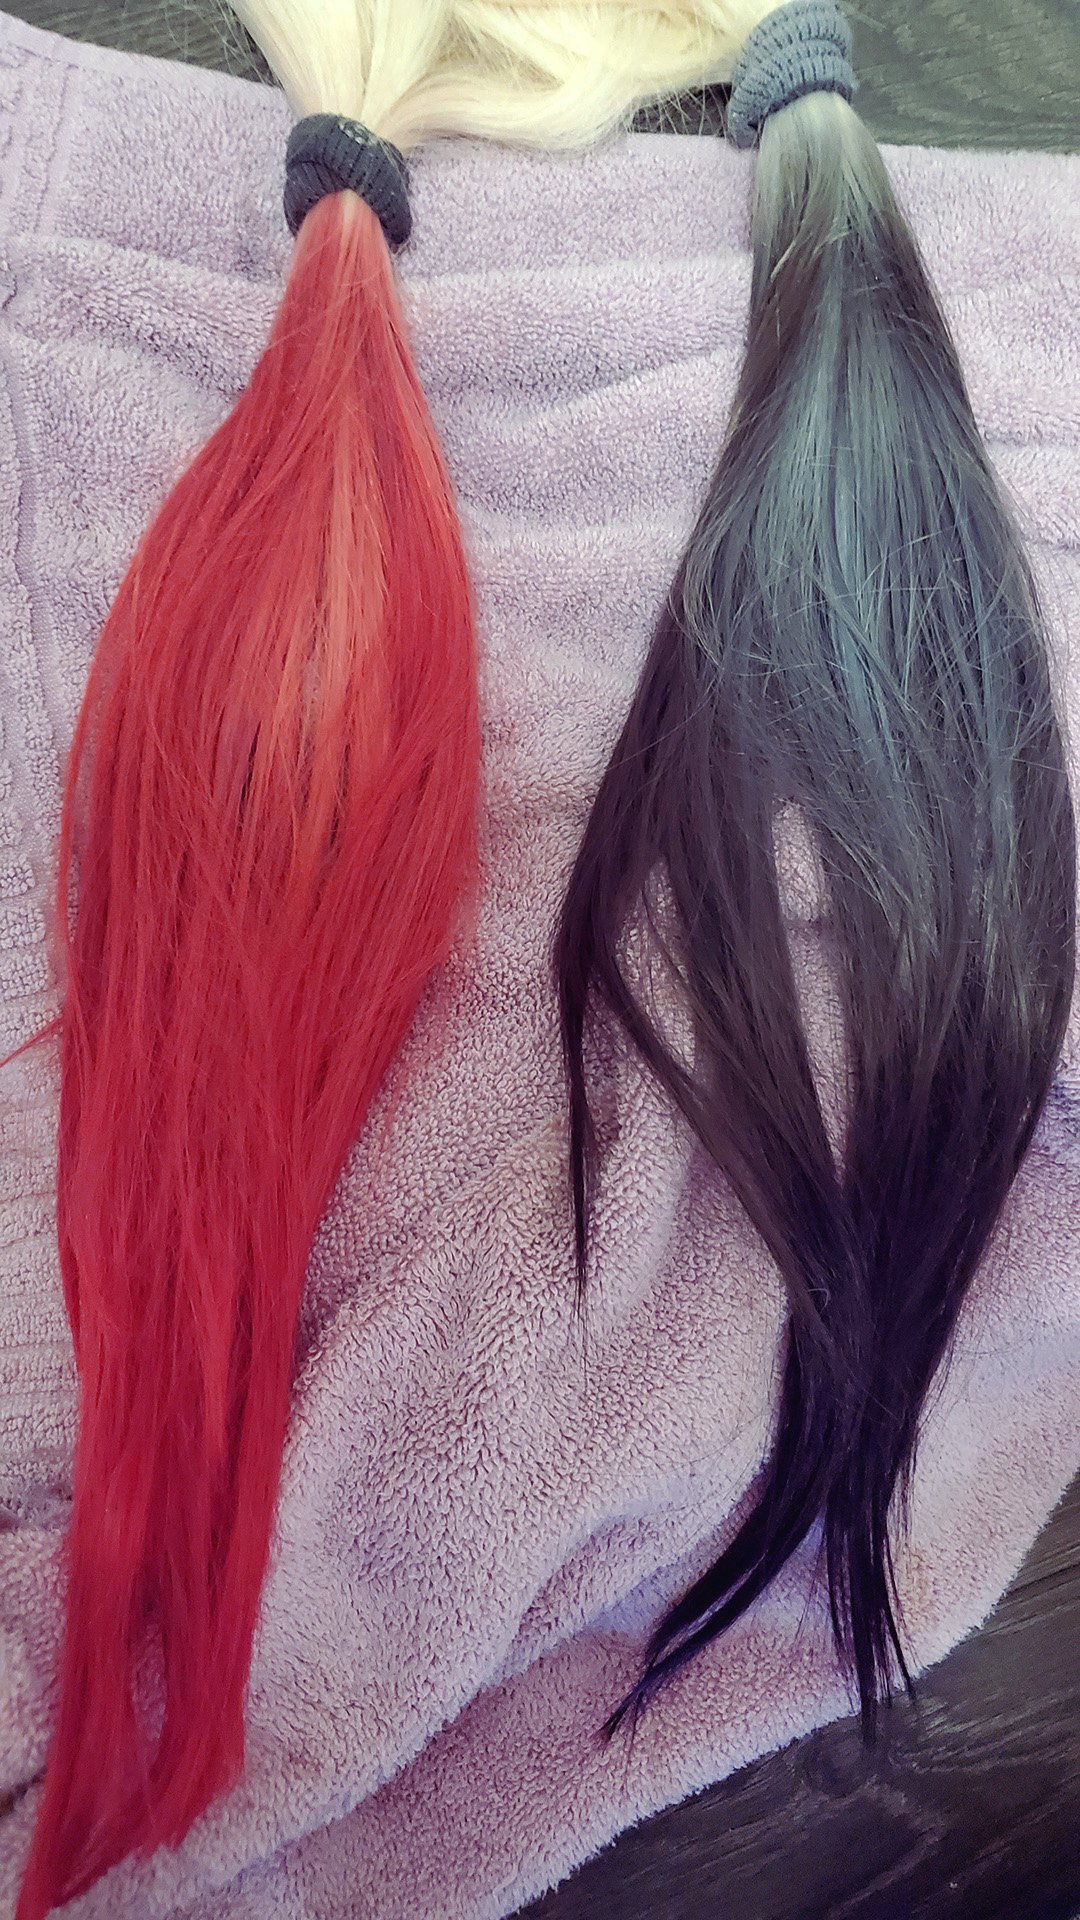
HOW IT SHOULD START LOOKING!


RINSE AND REPEAT
5. Moving onto the next pigtail
Once you’re done with the red dye, rinse out the pigtail and squeeze out any excess water. Dump out the pot of water, refill it, and reheat the water before adding in the black dye and more dish soap. You don’t need to worry about any small remnants of red dye that might stick to the bottom of the pot. The black dye will be too dark to notice.

6. Dunk & Dab
Do the same thing with the second pigtail. Use a clean piece of paper towel to get that softer blend effect again.

BE CAREFUL!!!***
When you’re dying each pigtail, make sure the other one is held out of the way. This is how I melted the ends of the red pigtail by accident… it slid under the pot and touched the burner while I was dunking the other one. Luckily I don’t have a gas burner with an open flame. It could’ve been MUCH worse.
OOPS #2 — To fix it, I just had to trim the melted ends off.
7. Rinse out & dry
Use cold water to rinse out the black dye, until the water runs clear. Then squeeze out most of the water with a towel.
Again, make sure it’s a towel you don’t care about getting dye stains on! (just in case)
Finished?
I realized when I was done, that the center of the pigtails didn’t get as much dye as the rest. This left patchy lighter spots. Luckily I had dye left over, since I only used half the bottle for each color.
OOPS #3 — I redyed them to make sure they were evenly dyed throughout.

Finished. Now you have a funky-colored wig!
This is the final result of my Harley Quinn wig. As it sat and dried, the dye seeped up a little higher than I thought it would..? Not exactly sure what happened there, but I don’t mind. To avoid this next time though, I wouldn’t let the dye sit AT the hair ties, but a bit below to allow some ‘seeping room’.
Only thing left is to finish styling it!
RELATED: Need to give your wig pigtails? Check out the tutorial here :)