
How to make EVA foam look like realistic leather
Turning EVA Foam into Realistic Leather: Tips and Tricks!
In the world of cosplay and prop-making, the use of versatile materials like EVA foam has become a staple for bringing fictional characters to life. In this post, I’ll show you my technique on how to transform EVA foam into realistic-looking leather. Depending on the mix of paint colors and detailing, this can be used to create leather for any cosplay - bracers, pouches, belts, and more!
What you’ll need:
EVA Foam
Pen or marker
Box cutter or X-Acto blade
Tin foil
Heat gun or blow dryer
Wood burning tool (optional*)
Respirator mask (if you are using the woodburner* - inhaling burning plastic fumes is dangerous!)
Contact cement glue
Simple Step-by-Step Slideshow
Keep reading below for full instructions!

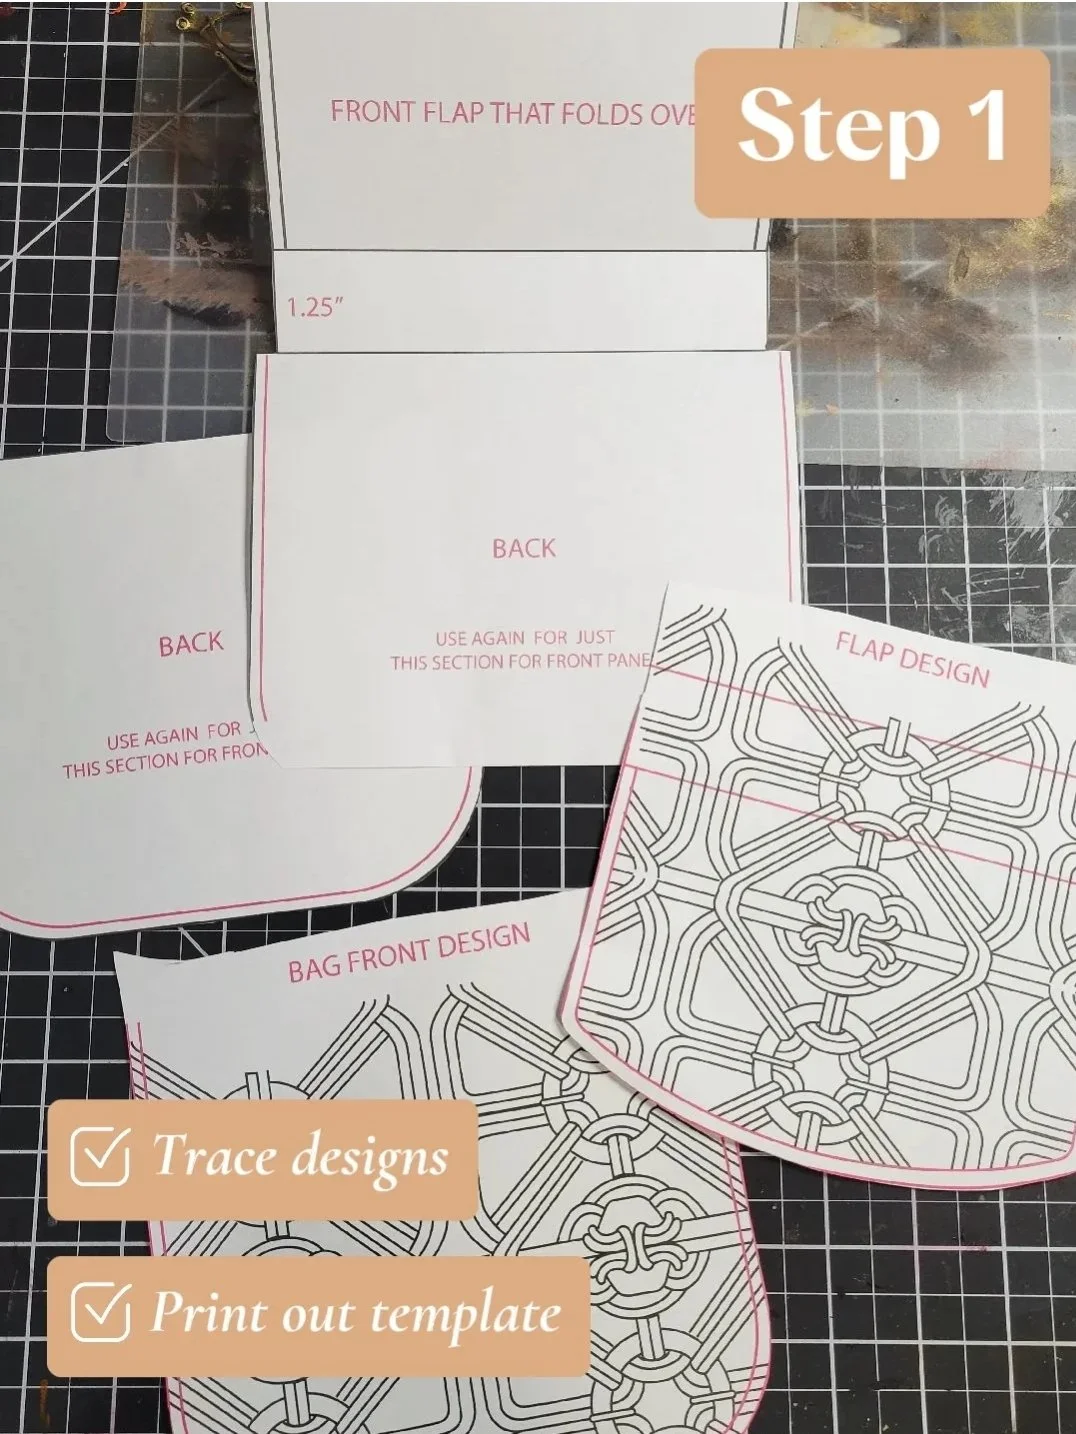


Step 1 - Make your Design and Template
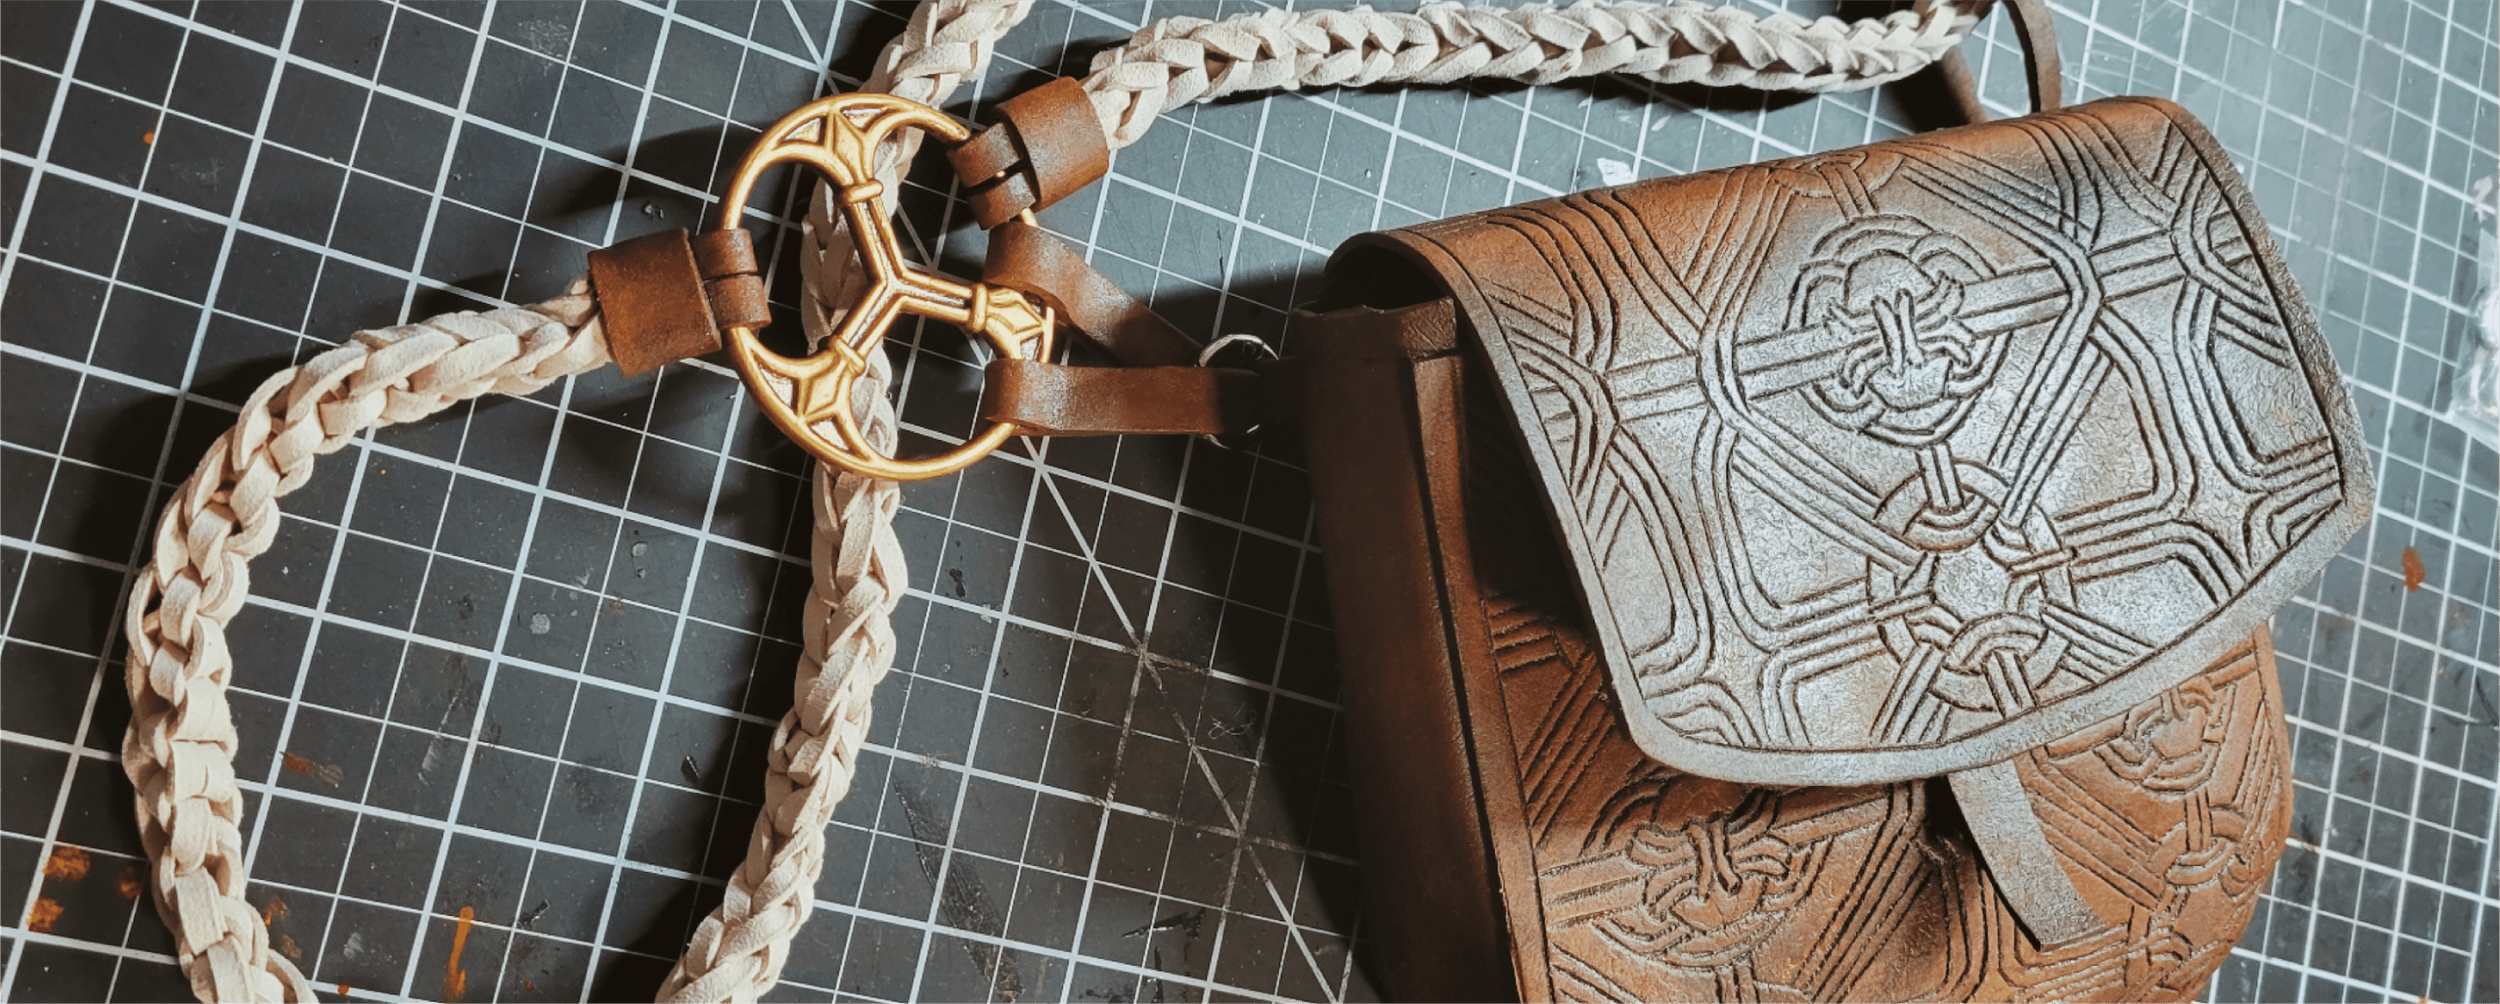
First thing’s first, you need a design! For this project I was creating a leather pouch for my God of War: Ragnarok Freya cosplay. I used Photo Mode within the game to gather a bunch of reference photos, and then traced the design on my computer using Adobe Illustrator. You can use whatever program you have though, or even print out the references and then trace or freehand the design yourself! I put the design onto a simple pouch template I found online that matched the style I wanted to make.
Step 2 - Trace onto Foam and Cut Out Pieces
Print out your template and trace it onto your EVA foam, then cut it out. Remember to label each piece to make sure you glue them together properly at the end. Also mark where any fold lines or glue sections are.


Step 3 - Transferring your Design
Next is to transfer the design to the EVA foam. (If you aren’t adding a design, can skip to painting.) I taped the printed design over the foam to stay in place, then used the tip of an x-acto blade to poke tiny holes through the paper - tracing the design. You can use anything sharp enough to poke the holes, such as a needle or sharpened pencil. When you remove the paper, you’ll see this created a dotted line in the foam that you can then draw over to have the design transferred. Like connect the dots!
NOTE: Make sure not to poke a hole too deep where it goes straight through thinner foam. Just enough to leave a visible mark!
Step 4 - Burning in the Design
To make a debossed design in the leather, I used my wood burning tool! I set it at a lower temperature to be safe and not completely melt through the foam. At an even, gliding pace with a light hand trace over the design to burn it into the foam. The thicker the foam, the more wiggle room you have and deeper you can make the design. If you push down with a heavy hand or linger in one spot too long, you will melt through the foam faster. Recommended: Practice on a scrap piece of foam first!
*HEALTH WARNING: USE A PROPER RESPIRATOR MASK AND HAVE PROPER VENTILATION! INHALING BURNING PLASTIC FUMES OF THE MELTING FOAM CAN BE TOXIC.

Poking holes and connecting the dots

Woodburning the design into the foam
Step 5 - Adding Texture
Take a sheet of tin foil and crumple it up into a medium ball. Heat it up with a heat gun or blow dryer, then press it firmly into the foam. Repeat until the whole piece has been ‘stamped’ with this texture! I go over it a couple times in spots to make it look varied and more natural.
Recommended: Wear a pair of heat resistant gloves to protect your fingers! The tin foil gets pretty hot. I found a cheap decent pair online!
Step 6 - Painting and Weathering
The fun part: painting! I start with a thin coat of light brown or tan paint, almost like drybrush. If you lay it on too thick, you’ll lose the detailed texture you just added. Then I use a darker shade or black and brush it into the grooves of the burned in design. Take a paper towel and wipe away the excess paint, leaving the dark paint in the grooves but mostly removed from the surface. The bit of the darker paint that remains makes it look worn and stained. You can play around with the exact colors and shades of brown for the leather look you want. Worn and weathered vs new and fresh. Can look at reference photos of different leather items for inspiration. Have fun with it and experiment! I added extra weathering where the fold lines would be on the pouch, to add a bit more of realism. To finish the paint and protect it, I did a light spray of matte sealant. Can also brush on some matte or semi-gloss Modge Podge.


Last Step - Gluing together and adding Details!
Final steps would be to glue all your pieces together and add any other details. Clasps, buckles, studs, belts, you name it!
